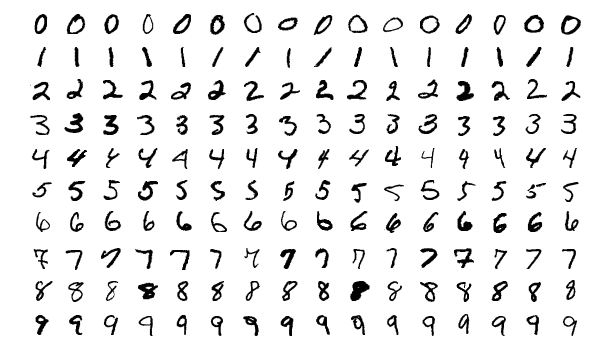
Simple MNIST convnet
간단한 Convolutional Network를 활용하여 MNIST 데이터셋 분류 모델 만들기
Author: fchollet
Date created: 2015/06/19
Last modified: 2020/04/21
Description: A simple convnet that achieves ~99% test accuracy on MNIST.

Setup
# 라이브러리 로드
import numpy as np
from tensorflow import keras
from tensorflow.keras import layers
Prepare the data
# 클래스 개수 및 input_shape 지정하기
num_classes = 10
input_shape = (28, 28, 1)

# the data, split between train and test sets
# 데이터를 train셋과 test셋으로 나눕니다.
(x_train, y_train), (x_test, y_test) = keras.datasets.mnist.load_data()

# Scale images to the [0, 1] range
# [0,255]의 이미지 스케일을 [0, 1]의 실수로 변환합니다.
x_train = x_train.astype("float32") / 255
x_test = x_test.astype("float32") / 255

# Make sure images have shape (28, 28, 1)
# (28, 28) shape의 이미지를 (28, 28, 1)로 변환합니다.
x_train = np.expand_dims(x_train, -1)
x_test = np.expand_dims(x_test, -1)
print("x_train shape:", x_train.shape)
print(x_train.shape[0], "train samples")
print(x_test.shape[0], "test samples")


# convert class vectors to binary class matrices
# 클래스 벡터를 이진 클래스 행렬로 변환합니다.
# 말이 어렵지 (0,1,2,3,,,9)이었던 class를
# [[1,0,0,0,0,0,0,0,0,0],
#  [0,1,0,0,0,0,0,0,0,0],
#  [0,0,1,0,0,0,0,0,0,0],
# ...
#  [0,0,0,0,0,0,0,0,0,1]] 로 바꾼다는 의미입니다.
y_train = keras.utils.to_categorical(y_train, num_classes)
y_test = keras.utils.to_categorical(y_test, num_classes)
Build the model
# 모델 만들기
model = keras.Sequential(
    [
        keras.Input(shape=input_shape),
        layers.Conv2D(32, kernel_size=(3, 3), activation="relu"),
        layers.MaxPooling2D(pool_size=(2, 2)),
        layers.Conv2D(64, kernel_size=(3, 3), activation="relu"),
        layers.MaxPooling2D(pool_size=(2, 2)),
        layers.Flatten(),
        layers.Dropout(0.5),
        layers.Dense(num_classes, activation="softmax"),
    ]
)

model.summary()
Train the model
# 배치사이즈 및 epoch 사이즈 지정하기
batch_size = 128
epochs = 15

# 모델 묶기
model.compile(loss="categorical_crossentropy", optimizer="adam", metrics=["accuracy"])

# 모델 훈련하기
model.fit(x_train, y_train, batch_size=batch_size, epochs=epochs, validation_split=0.1)
Evaluate the trained model
# 모델 평가하기
score = model.evaluate(x_test, y_test, verbose=0)
print("Test loss:", score[0])
print("Test accuracy:", score[1])

# Test loss: 0.026443352922797203
# Test accuracy: 0.9900000095367432
'Tensorflow' 카테고리의 다른 글
| 텐서플로우 Dataset: from_generator 설명 (0) | 2020.11.03 |
|---|---|
| 케라스 Conv-LSTM을 활용한 영상 예측 예제 (0) | 2020.11.03 |
| 텐서플로우 Dataset: repeat(), batch(), take() (2) | 2020.10.30 |
| Keras 이미지 Extract features 및 Feature map 그리기 (0) | 2020.10.29 |
| Tensorflow 케라스 EfficientNet Finetuning 예제 - 1 (0) | 2020.10.28 |